Building a CI-CD pipeline on Azure Kubernetes Service (AKS) — Part 3
This Part 3 of a 3-part series on how to build a CI-CD pipeline using Azure DevOps, Azure Container Registry Service (ACR) and Azure Kubernetes Service (AKS).
Part 1 : Setup and building the docker image
Part 2 : Creating the build Pipeline in Azure Dev Ops
Part 3 : Creating a release and Continuous Deployment (<- you are here)
In our previous blog posts, we have created a build pipeline, and made sure it runs with Continuous Integration capabilities which reflects any code changes or merges to the master branch, as a new build that is also being pushed to our Azure Container Registry (ACR).
That was powerful, but today we are going to close the loop and leverage that even further with adding a release pipeline that will deploy our app to the kubernetes cluster we have created in phase 1.
Warning : Hot Topic

If you are not so familiar with Pods, Deployments and Services of kubernetes there are plenty of resources available out there since it is extremely hot topic these days.
I can recommend you to actually start with the kubernetes documentation which is quite good, move on to books (“Kubernetes up and running”) and free online training such as on Edx “Introduction to Kubernetes”
- Create The Release pipeline.
Going back to our Azure Dev Ops portal we can either look for
Pipeline->Release menu, or simply click on a release button that is located on our build page summary.

The Release pages contains two major parts :
- Artifacts : The sources and triggers for this deploy
- Stages : The steps needed for this pipeline to complete (could be for example “dev stage” than “Integration tests” and then “Staging” etc).
we will keep it simple here and use only one stage we will call “dev” .
The template selector for the default stage 1 is already open so we can select “Deploy to Kubernetes cluster” and go back to this stage configuration later.

Once this popup is closed simply name your stage accordingly

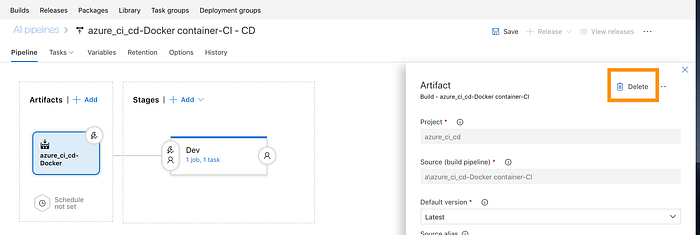
Starting from the left hand side of the “Artifacts” part we will first delete the default selected artifact and than add a new one that is pointing to our ACR source :
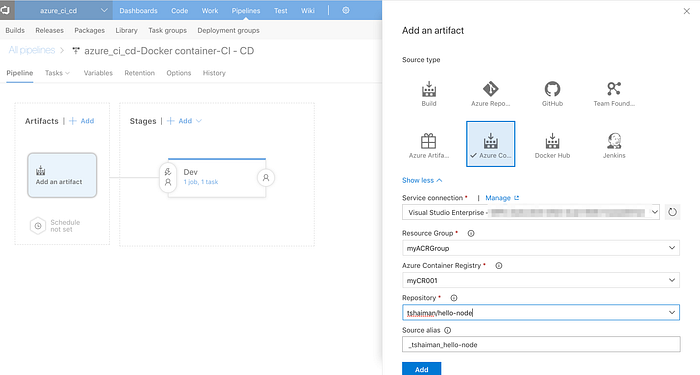
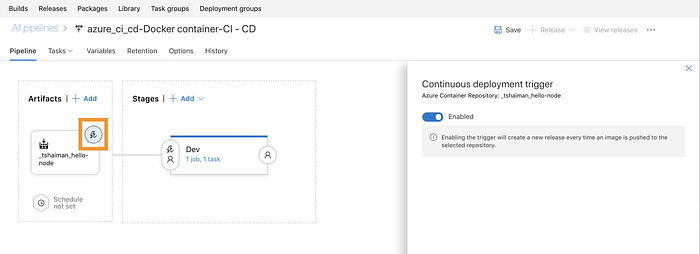
Fill in your ACR group and repository names, confirm, and enable the little trigger button so that Continuous Deployment will be enabled for this pipeline (hence -> every successful push to the ACR from the build phase will trigger this phase).
2. Define Release Tasks and grant Access permissions
We now move to a more advance part, but it won’t be too painful.
click on the “1 job,1 Task” link under the Dev Stage and that will take you to the Job configuration screen that is pre-configured for Kubernetes commands (recall the template we have selected previously).
Select the first task which is called “Kubectl apply” :
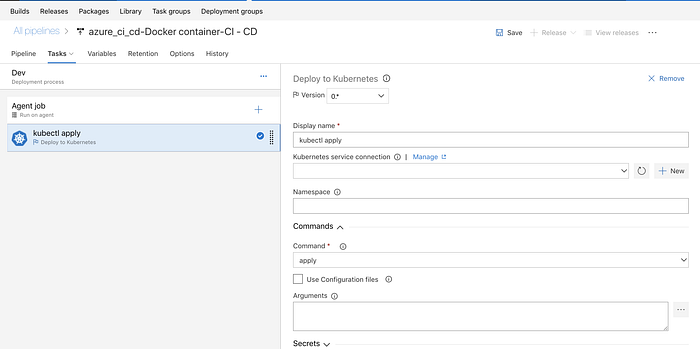
The first thing we need to do is to add a new service connection to our AKS cluster, and to grant that access from VSTS to the AKS cluster.
we also need to grant Access to our ACR from the kubernetes cluster, since the cluster will need to Pull images from ACR and for that purpose he needs privileges. It sounds complex, but I will break it up to small pieces.
A. (Recap)get the Kubernetes cluster server name and credentials.
In part one we already checked that our cluster is up and running, we will repeat those tasks and make sure our azure cluster is selected as the default context:
$> kubectl config get-contexts
which will print all the kubernetes contexts and will mark the current context with an asterisk. If this is not the case for you than re-run the command that fetches the cluster credentials and set it as the default:
$> az aks get-credentials --resource-group myAKSCluster --name myAKSClusterif we want to view our full server url that we need to use in the portal :
$> cat ~/.kube/configit is a good time to mention you have a hidden kubernets folder under your home folder called .kube, where all cluster configuration is maintained.
look for the server URL in this config file :

last part in the terminal is to copy this config file to our clipbaord:
$> pbcopy < ~/.kube/configwe now have all the information we need to configure our kubernetes server for our pipeline.
head back to the Azure Dev Ops portal and click on “manage” on the right hand side of the form where you are required to configure an endpoint :
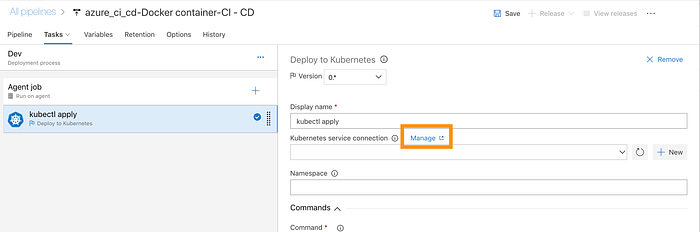
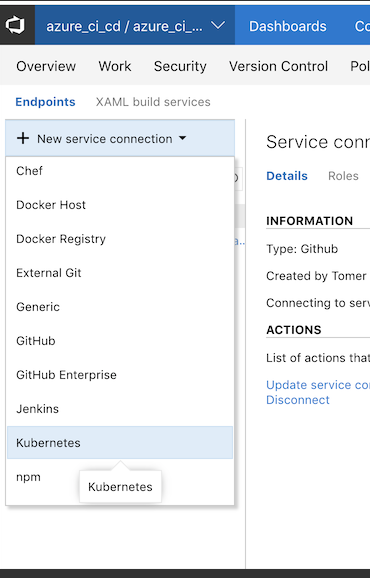
This will open a brand new tab which we will be used to configure the endpoint. Add a new Service Endpoint ( the ‘+’ button on the left hand side of the screen) and fill in the details from previous steps :
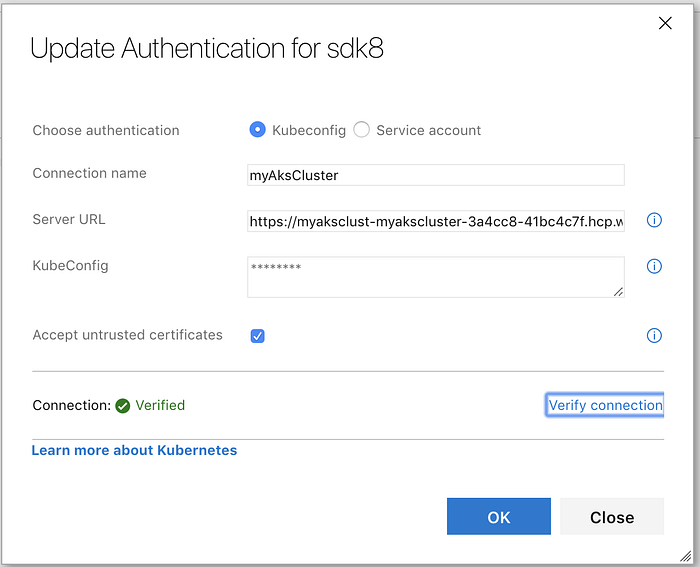
The Server URL should be copied from the config file and should be the full https address, as it appears on the config file.
than paste the content of the config file under the “KubeConfig” field
mark “Accept untrusted certificates” and verify the connection.
Once it is verified you can close this tab.
we are ready now to configure our first kubernetes task which will be deploy 3 pods with the node-js app we have been building in part 1.
The Source code for this part can be found on this GitHub repo.
Configure the first task as follows :
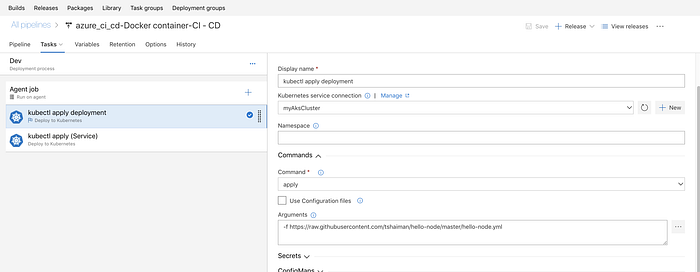
Note we are using a “kubectl apply -f filename” command here.
the file we are pointing at is the hello-node.yml :
apiVersion: apps/v1 # for versions before 1.9.0 use apps/v1beta2
kind: Deployment
metadata:
  name: hello-master
  labels:
    app: hello
spec:
  selector:
    matchLabels:
      app: hello
  replicas: 3
  template:
    metadata:
      labels:
        app: hello
    spec:
      containers:
      - name: hello
        image: mycr001.azurecr.io/tshaiman/hello-node
        resources:
          requests:
            cpu: 100m
            memory: 100Mi
        ports:
        - containerPort: 8080
          name: nodejs-port
This is the (almost) the simplest deployment plan. it points to our ACR registry with the corresponding repository, it defines the container port to be used, assigning it the name “nodejs-port’ which we late be using in our service definition.
Note : It is not a best-practice to use the image with latest tag or with no tags at all. you will not be able to revert to a specific version, and the entire idea behind rollbacks is broken.
This is purely for demonstration purposes. please visit the best practice guidelines at : https://kubernetes.io/docs/concepts/configuration/overview/
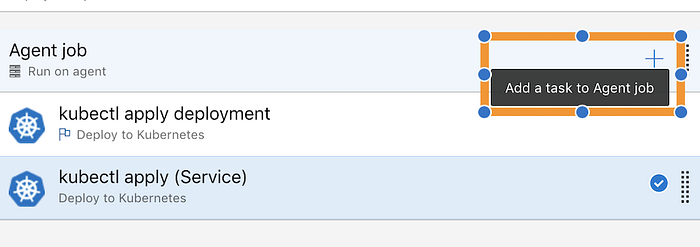
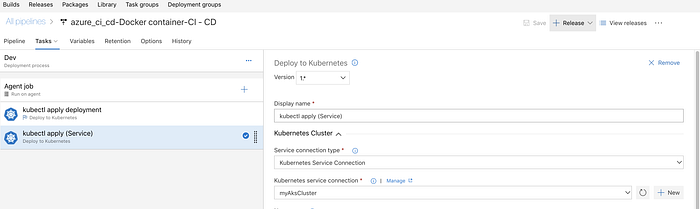
Next, we need to add a second task, that will create a Service running with Load Balancer on our deployments :
The Configuration for this task is almost identical , except that it points to a Service definition file :
apiVersion: v1
kind: Service
metadata:
  name: hello-service
  labels:
    app: hello
spec:
  ports:
  - port: 80
    targetPort: nodejs-port
  selector:
    app: hello
  type: LoadBalancer
For more information on Kubernetes services visit : https://kubernetes.io/docs/concepts/services-networking/service/
3. Authenticate AKS to access ACR
We are almost done. one thing we need to do is to authorise the Kubernetes cluster to access our Azure Container Service.
There are two ways to do it :
- To use Azure AD Role assignment that grants the cluster’s service principal access to the container registry.
It sounds a lot but its actually running a single shell command. - To use Secrets : sometimes for organisations with pre-defined policies this is the way to go. This Process is described here and here.
we shall go with option 1 .
Open the file aks_permissions.sh from the gitHub repository and edit your cluster details :
#!/bin/bash

AKS_RESOURCE_GROUP=myAKSCluster
AKS_CLUSTER_NAME=myAKSCluster
ACR_RESOURCE_GROUP=myACRGroup
ACR_NAME=myCR001

# Get the id of the service principal configured for AKS
CLIENT_ID=$(az aks show --resource-group $AKS_RESOURCE_GROUP --name $AKS_CLUSTER_NAME --query "servicePrincipalProfile.clientId" --output tsv)

# Get the ACR registry resource id
ACR_ID=$(az acr show --name $ACR_NAME --resource-group $ACR_RESOURCE_GROUP --query "id" --output tsv)

# Create role assignment
az role assignment create --assignee $CLIENT_ID --role Reader --scope $ACR_ID
(replace the above credentials with yours).
source : https://docs.microsoft.com/en-us/azure/container-registry/container-registry-auth-aks
we are finally done with the configurations of this pipeline and its time to test.
4. Testing our Release Task
In order to check that all is running correctly we shall trigger a manual release and then examine our cluster using the terminal (or if you wish , with the Kubernetes UI using proxy, but I will not demonstrate it here)
Click on the “+ Release” button on the top right side of the screen and create a new release.
Fill in the release details and select the latest version on our artifact :

Head over to the release info Page and click “Deploy” under the stage box:

You can view the logs by clicking on the “Logs” button once the deployment has started.
after a while (depends if you are running this first time in which the AKS needs to provision a load balancer for you, which might take some time)
you will see the following output:

However, the fact that the release was successful, doesn't mean the cluster in good shape. it simply mean that our command (“kubectl apply -f “) succeeded.
Lets verify our Cluster state :
$> kubectl get pods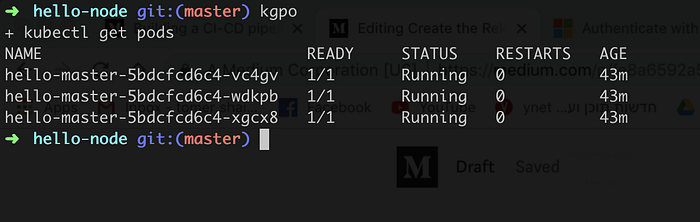
$> kubectl get services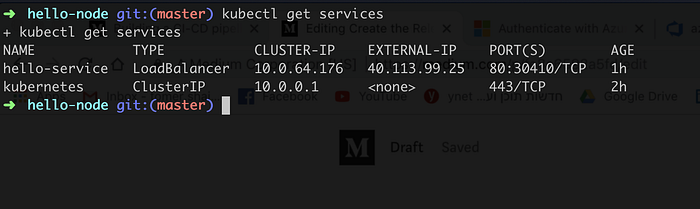
we can now see that our Load Balancer has an external IP address we can use:
$> curl 40.113.99.25
I was never that happy to see “Hello World!” on my screen before.
You should now check you entire CI/CD pipeline : make a git change, watch the build as it detecting that change and pushes a new image to your Azure Container Registry , wait few more seconds for the release to finish and it should be at no time that the rollout on the pods will take effect and allow you to view your changes.
5. Wrap Up
I tried to give a taste of how CI/CD should work, the concepts are similar if you are using a different cloud provider or a different tool such as Jenkins.
The tutorial was not a kubernetes tutorial, there is a lot to learn and understand about this exciting technology and how deployments and updates are being pushed and rolled back : https://kubernetes.io/docs/concepts/workloads/controllers/deployment/#rolling-back-a-deployment
I was surprised how fast Microsoft has adopted those technologies to be build in part of its Dev Ops solution suite. This seems like a mature technology to try it out on your next project.
I hope you had fun, feel free to tweet if you have managed to build this pipeline yourself adding me in your hashtags.